- No products in the cart.
How to make real beer
22
Mar
Brewing your own beer is easy, enjoyable and can save you money. Our expert guide explains the history of beer and how to make your own
Have you ever wondered how to make real beer? It sounds intimidating, but the truth is it’s easy, great fun and will end up saving you money.
In our expert guide, discover the history of beer making and learn how to make beer.
A brief history of beer
Around 16,000 years ago, our ancestors first started to cultivate grain. And, at the same point in our history, the first beers were starting to appear, probably made from that very grain. These beers were developed by the Sumerians, who lived in what is now southern Iraq.
Such beverages were crude compared to modern standards and, served in vast jugs, they were drunk through reed straws as the beer in the jug was still fermenting.
By 10,000 BC, the first written ‘words’ were appearing on clay tablets – among them a first recipe for a sort of bread that can also be made into a beer. Thus, one of the first recorded writings in human history was for homebrew. Although the brewing process has become more sophisticated, the enjoyment derived from sharing a batch of homemade beer with friends remains reassuringly the same thousands of years later.
Why brew your own beer?
For many homebrewers, it’s the cost. Back in January, the average cost of a pub pint rose above £3 for the first time, in many areas of the country it is much higher still. I can brew beer for 40p a pint. A no-brainer.
Secondly, I’d say flavour. When I was younger I used to drink supermarket lager and I had long-assumed that lager tasted better than ale and it was (and is) incredibly cheap – you pay more for bottled water.
Now, of course, I cannot believe what I was missing. As soon as I was introduced to the world of beers, ales, porters, bitters, stouts, milds and even properly conditioned lagers, I realised that beer had a range of wonderful flavours and subtleties to rival wine. My quest to make the finest beer has become an obsession.
Thirdly, homebrew is almost certainly better for you and lower in calories than any mass-produced beer or lager on offer. It doesn’t contain any additives and you know exactly what’s gone into it. I find it odd that we British consumers have become so anxious about what we eat that we want to know what field our Sunday roast was born in and who its grandmother was, yet when it comes to beer we don’t have the same considerations.
Lastly, there is great satisfaction to be had from using home-grown or foraged ingredients. They are natural, local and sustainable. And from an environmental perspective, to reuse a barrel or bottle five or more times is far better for the planet than a new bottle for every beer, even if you only consider the carbon dioxide released through distribution. It’s joy all round.
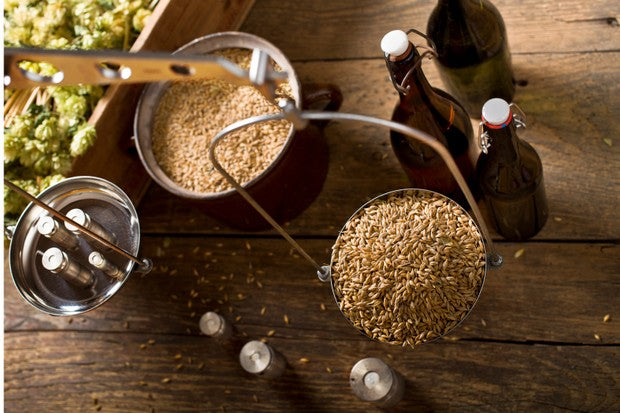
Basic brewing ingredients
1. Hops
Hops are the flowers of the hop vine; you can find them in the hedgerows from late August to early September. In the wild, the vine will climb trees, reaching 4m (13ft) or more. Commercially, hops are grown up long, sturdy poles and the whole vine is harvested.
Hops add bitterness to the wort and aroma to the final beer, which would otherwise be too sweet-tasting. Using hops originally caught on because they inhibit the growth of bacteria.
2. Yeast
Yeast is a micro-organism that is actually a fungus. It feeds on sugar, so when added to a sugar solution, as with making beer, it will multiply and do so until it has eaten all the available sugar, producing alcohol in the process. It will then die off, leaving a sediment.
3. Malt
Malted grains are grains that have been allowed to germinate before the germination is halted with hot air. This turns the grain’s starches into the sugars needed for the fermentation process.
What you need
Getting your homebrew up and running is where most of the costs come in. But with a bit of foraging, it is possible to bring the cost down to practically nothing.
The basic equipment you’ll need includes:
- A plastic fermentation bucket that holds 40 pints (22l), plus a lid. You can buy these from homebrew outlets or health food shops. Or forage a food-grade bucket from a local restaurant – they are often thrown away.
- A long-handled plastic spoon for stirring.
- A 40-pint (22l) barrel or strong beer bottles (you’ll need 40 or so). The barrel can cost up to £25 but brown beer bottles can be foraged for free from recycling boxes – ask the owner first – or by asking your local pub for empties.
- A 2-3m (6½-10ft) length of clear plastic tube is used to siphon the beer into barrel or bottles once it has fully fermented.
- A typical brew kit – this one requires you to add 1kg (2lb 2oz) of sugar.
- Sterilising powder. You can also used crushed campden tablets.
- Hydrometer – useful for measuring alcohol content but not essential.
- Measuring cup.
- Sachets of yeast – these are usually included with a beer kit, see 5.
- Bottle capper and caps – a simple lever for crimping bottle tops on to your beer bottles. The bottle tops become airtight, meaning you can keep the beer fresh for months or even years. Beer in a barrel will go off within a couple of weeks after being broached.
Sterilise, sterilise, sterilise
Almost every homebrew disaster can be attributed to poor sterilisation. I scrub all my equipment with soap and a cloth, then sterilise it using a powdered bleach (available from homebrew shops). Put a few teaspoons of powder in the fermentation bin and top up with warm water. Leave for up to two hours and then throw in all the equipment you will be using to ensure it’s all sterilised. Rinse everything thoroughly before use.
How to brew your own beer
Easy – beer from a kit
A standard kit includes a large tin of malt extract infused with hops and some yeast, and costs around £10. You will need to add your own sugar. Kits around £20 have slightly more malt extract. The difference between the two is seen in the body of the beer – the more refined sugar you add, the thinner the beer.
It is possible to substitute the sugar in the cheaper kit for dried malt extract, available from most homebrew shops. But this seems largely pointless since you would be paying the same as you would for a better kit.
I always plump for the £20 kit, as it means you can often choose a beer you like and get brewing straight away. The most recent kit I bought was a St Peters Brewery India Pale Ale and I was extremely pleased with the results.
Method:
1. Set 3.6l (6¼pts) of water to boil – always heat more than the recipe suggests, as the water will reduce as it comes to the boil.
2. Sterilise and rinse the fermentation bin and spoon. Stand the tins of malt extract in a washing-up bowl and top up with very hot water. Try to completely submerge the tins. This helps to loosen the malt extract and makes it easier to pour.
3. Pour the malt extract into the bottom of the fermentation bin. Pour over the boiling water and stir quickly yet methodically with a plastic spoon. You need to ensure that all of the malt extract dissolves. If you’re using a cheaper kit, at this stage you will stir in the sugar.
4. Top up with cold water to the desired amount. If you require a stronger beer, top up with less than recommended, or more for a weaker beer.
5. If your kit comes with powdered hops, add it along with yeast once the temperature is lukewarm. Move bin to a warm place for 4-7 days.
6. After this period, ensure that fermentation has ceased. A hydrometer is really useful (see below) but if you don’t have a hydrometer, check that your brew is no longer bubbling.
7. You now need to bottle your beer or put it in a barrel (see above).
Source: https://www.countryfile.com/how-to/food-recipes/learn-how-to-make-real-beer/